1. Replacing the Marker with an Image Only
 1
 2
 3
 4
 5
 6
 7
 8
 9
10
11
12
13
14
15
16
17
18
|
// Just reset the annotationView image inside the following function
func mapView(_ mapView: MAMapView!, viewFor annotation: MAAnnotation!) -> MAAnnotationView! {
  if annotation.isKind(of: MAPointAnnotation.self) {
    if annotation.title != "当前位置" {
      let pointReuseIndetifier = "pointReuseIndetifier"
      var annotationView: MAPinAnnotationView? = mapView.dequeueReusableAnnotationView(withIdentifier: pointReuseIndetifier) as! MAPinAnnotationView?
      if annotationView == nil {
        annotationView = MAPinAnnotationView(annotation: annotation, reuseIdentifier: pointReuseIndetifier)
      }
      annotationView!.canShowCallout = true
      annotationView!.image = UIImage(named: "公交站牌32")
      // Adjust the offset based on your own image size
      annotationView!.centerOffset = CGPoint(x: 0, y: -18);
      return annotationView!
    }
  }
  return nil
}
|
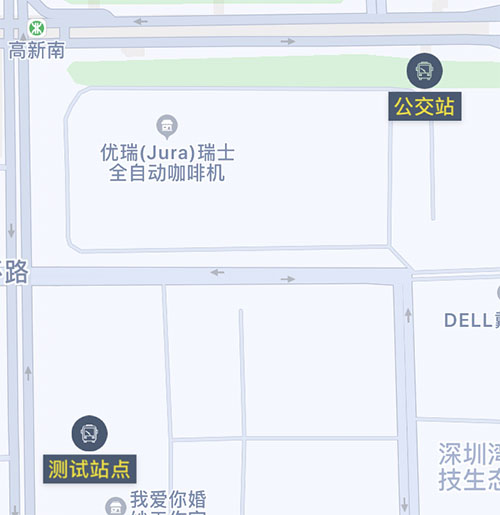
Tap it and you get a popup:

But if you want to show both an icon and text at the same time, you need to build a custom annotation view.
2. Custom Style with Both Image and Text
1. Create a Custom UIView
Reference: Swift - Building a custom component with XIB and UIView
 1
 2
 3
 4
 5
 6
 7
 8
 9
10
11
12
13
14
15
16
17
18
19
20
21
22
23
24
25
26
27
28
29
30
31
32
33
34
35
36
37
38
|
class CustomStationAnnotationView: UIView {

  @IBOutlet weak var stationImage: UIImageView!
  @IBOutlet weak var stationLabel: UILabel!

  // Layout-related setup
  override func layoutSubviews() {
    super.layoutSubviews()
  }
  /*** The methods below are the standard setup required to load the xib into this custom class. You normally do not need to change them. ****/
  var contentView:UIView!

  // Load the view from xib during initialization
  override init(frame: CGRect) {
    super.init(frame: frame)
    contentView = loadViewFromNib()
    // Set font and background colors
    stationLabel.backgroundColor = ViewUtility.UIColorFromRGB(color_vaule: "#485A73")
    stationLabel.textColor = ViewUtility.UIColorFromRGB(color_vaule: "#EEDA1B")
    addSubview(contentView)
  }

  // Load the view from xib during initialization
  required init?(coder aDecoder: NSCoder) {
    super.init(coder: aDecoder)
    contentView = loadViewFromNib()
    addSubview(contentView)
  }
  // Load xib
  func loadViewFromNib() -> UIView {
    let className = type(of: self)
    let bundle = Bundle(for: className)
    let name = NSStringFromClass(className).components(separatedBy: ".").last
    let nib = UINib(nibName: name!, bundle: bundle)
    let view = nib.instantiate(withOwner: self, options: nil).first as! UIView
    return view
  }
}
|
For now I drew the station style like this. Make sure to set Background to Clear Color, meaning no background color.
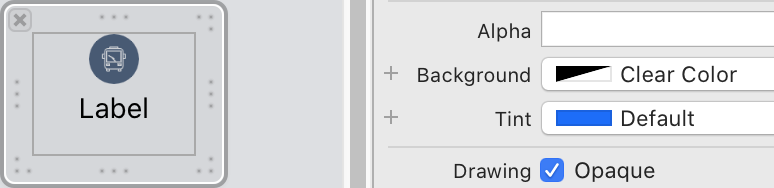
2. Create a Custom CustomAnnotationView
Create a new class called CustomAnnotationView, inherit from MAAnnotationView, and override init to embed the custom UIView.
 1
 2
 3
 4
 5
 6
 7
 8
 9
10
11
12
13
14
15
16
17
18
|
import UIKit

class CustomAnnotationView: MAAnnotationView {

  override init!(annotation: MAAnnotation!, reuseIdentifier: String!) {
    super.init(annotation: annotation, reuseIdentifier: reuseIdentifier)
    // Load the custom UIView
    let station = CustomStationAnnotationView.init(frame: CGRect.init(x: 0, y: 0, width: 80, height: 60))
    // Set the station name shown in the custom view
    let title:String = annotation.title as! String
    station.stationLabel.text = title
    self.addSubview(station)
  }

  required init?(coder: NSCoder) {
    fatalError("init(coder:) has not been implemented")
  }
}
|
3. Add Station Data
First create a mapView (I will skip that part here), then add custom point annotations:
 1
 2
 3
 4
 5
 6
 7
 8
 9
10
11
12
13
14
15
16
17
18
19
20
21
22
23
24
25
26
27
28
29
30
31
32
33
34
35
36
37
38
39
40
41
42
43
|
// Station is a custom object containing a name and coordinates
var stationArray=Array<Station>()
var showStationAnnotationArray=Array<MAPointAnnotation>()

// Add one local station for testing
func addStationArray() {
  let station = Station.init()
  station.name = "Bus Stop"
  station.lat = 2253242
  station.lng = 11395239
  stationArray.append(station)
  self.showStationPoint()
}

// MARK: - Add station annotations
func showStationPoint() {
  for station in stationArray {
    let pointAnnotation = MAPointAnnotation()
    pointAnnotation.coordinate = CLLocationCoordinate2D(latitude: Double(station.lat)/100000.0, longitude: Double(station.lng)/100000.0)
    pointAnnotation.title = station.name
    pointAnnotation.subtitle = station.note
    showStationAnnotationArray.append(pointAnnotation)
  }
  mapview.addAnnotations(showStationAnnotationArray)
}

//MARK: - Set the custom map annotation style
func mapView(_ mapView: MAMapView!, viewFor annotation: MAAnnotation!) -> MAAnnotationView! {
  if annotation.isKind(of: MAPointAnnotation.self) {
    if annotation.title != "当前位置" {
      let customReuseIndetifier: String = "customReuseIndetifier"
      var annotationView = mapView.dequeueReusableAnnotationView(withIdentifier: customReuseIndetifier) as? CustomAnnotationView
      if annotationView == nil {
        annotationView = CustomAnnotationView.init(annotation: annotation, reuseIdentifier: customReuseIndetifier)
      }
      annotationView?.canShowCallout = false
      annotationView?.isDraggable = true
      annotationView!.centerOffset = CGPoint(x: -40, y: -30)
      return annotationView!
    }
  }
  return nil
}
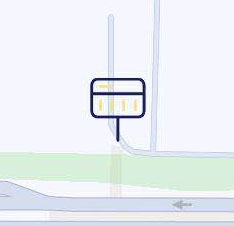
|
The final result looks like this: