0.接入推送
0.创建推送证书、创建极光推送应用
这部分不做赘述
1.接入iOS SDK
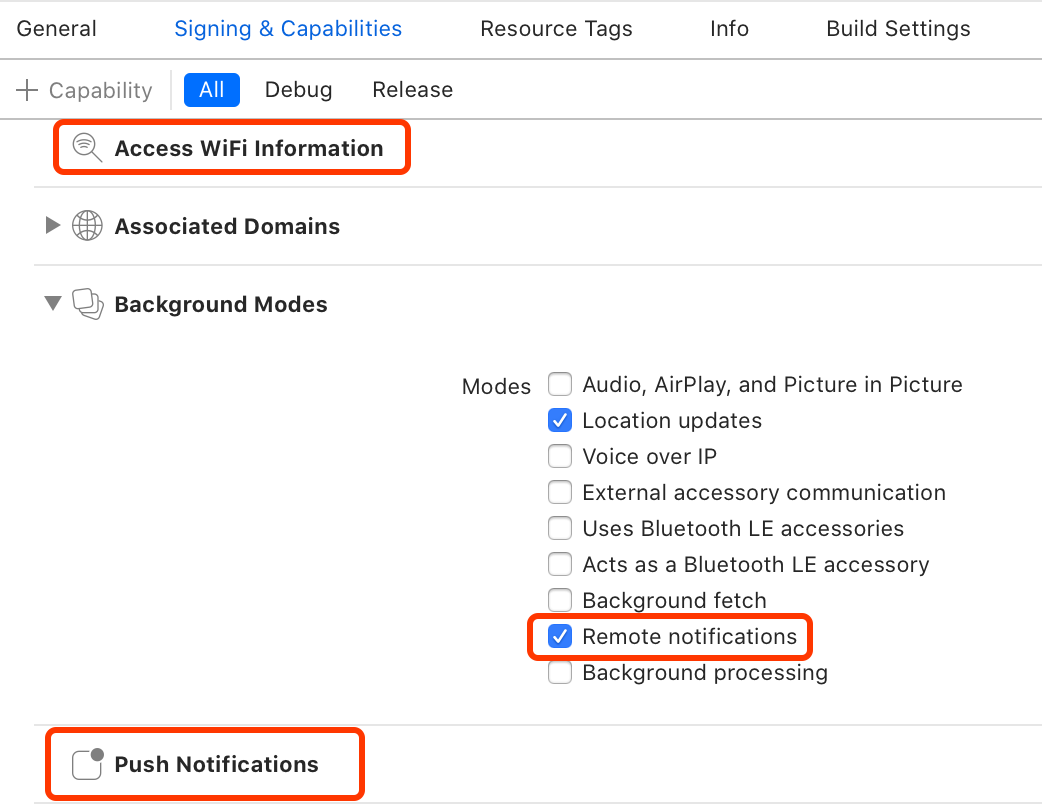
在 Siging & Capabilities 中添加 Access WiFi Information 和 PushNotifications
同时打开 Remote notifications
在Podfile中加入
1
2
| pod 'JCore'
pod 'JPush'
|
然后执行 pod install 导入SDK
在桥接文件中加入
1
2
3
4
5
6
| // 引入 JPush 功能所需头文件
#import "JPUSHService.h"
// iOS10 注册 APNs 所需头文件
#ifdef NSFoundationVersionNumber_iOS_9_x_Max
#import <UserNotifications/UserNotifications.h>
#endif
|
这部分会有版本选择以及IDFA等问题,详见:极光文档
1.接收消息
1.注册极光推送
在AppDelegate中的didFinishLaunchingWithOptions中注册极光推送
1
2
3
4
5
6
7
8
9
| func application(_ application: UIApplication, didFinishLaunchingWithOptions launchOptions: [UIApplication.LaunchOptionsKey: Any]?) -> Bool {
// 推送代码
let entity = JPUSHRegisterEntity()
entity.types = 1 << 0 | 1 << 1 | 1 << 2
JPUSHService.register(forRemoteNotificationConfig: entity, delegate: self)
// 填写自己的appKey
JPUSHService.setup(withOption: launchOptions, appKey: "xxxxx", channel: "App Store", apsForProduction: false, advertisingIdentifier: nil)
return true
}
|
2.接收消息
编写上传deviceToken、接收推送消息的执行方法
 1
 2
 3
 4
 5
 6
 7
 8
 9
10
11
12
13
14
15
16
17
18
19
20
21
22
23
24
25
26
27
28
29
30
31
32
33
34
35
36
37
38
39
40
41
42
43
| // MARK: --推送代理
extension AppDelegate : JPUSHRegisterDelegate {
func jpushNotificationCenter(_ center: UNUserNotificationCenter!, openSettingsFor notification: UNNotification!) {
print("jpushNotificationCenter")
}
func jpushNotificationAuthorization(_ status: JPAuthorizationStatus, withInfo info: [AnyHashable : Any]!) {
print("jpushNotificationAuthorization")
}
//系统获取Token
func application(_ application: UIApplication, didRegisterForRemoteNotificationsWithDeviceToken deviceToken: Data) {
_ = deviceToken.reduce("",{$0 + String(format:"%02x",$1)})
JPUSHService.registerDeviceToken(deviceToken)
}
//获取token 失败
func application(_ application: UIApplication, didFailToRegisterForRemoteNotificationsWithError error: Error) { //可选
print("did Fail To Register For Remote Notifications With Error: \(error)")
}
@available(iOS 10.0, *)
func jpushNotificationCenter(_ center: UNUserNotificationCenter!, willPresent notification: UNNotification!, withCompletionHandler completionHandler: ((Int) -> Void)!) {
let userInfo = notification.request.content.userInfo
if notification.request.trigger is UNPushNotificationTrigger {
JPUSHService.handleRemoteNotification(userInfo)
UIApplication.shared.applicationIconBadgeNumber = notification.request.content.badge as! Int
}
// 需要执行这个方法,选择是否提醒用户,有Badge、Sound、Alert三种类型可以选择设置
print("前台 收到推送 userInfo=\(userInfo)")
completionHandler(Int(UNNotificationPresentationOptions.alert.rawValue))
}
@available(iOS 10.0, *)
func jpushNotificationCenter(_ center: UNUserNotificationCenter!, didReceive response: UNNotificationResponse!, withCompletionHandler completionHandler: (() -> Void)!) {
print("点击推送消息 content=\(response.notification.request.content.userInfo)")
let userInfo = response.notification.request.content.userInfo
if response.notification.request.trigger is UNPushNotificationTrigger {
JPUSHService.handleRemoteNotification(userInfo)
}
completionHandler()
}
}
|
这时候我们已经能在jpushNotificationCenter 中接收到推送消息内容了
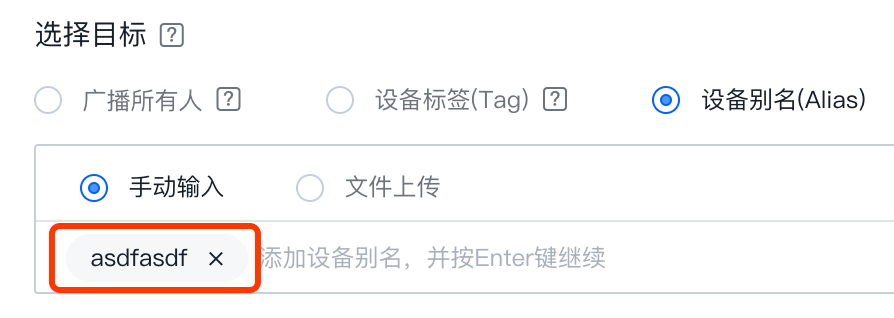
3.为设备设置唯一标识
一般将用户的唯一id、手机号用作标识符,只需在用户登录后执行
1
2
3
| JPUSHService.setAlias("手机号", completion: { (iResCode, iAlias, seq) in
print("alias,\("手机号") . completion,\(iResCode),\(String(describing: iAlias)),\(seq)")
}, seq: 0)
|
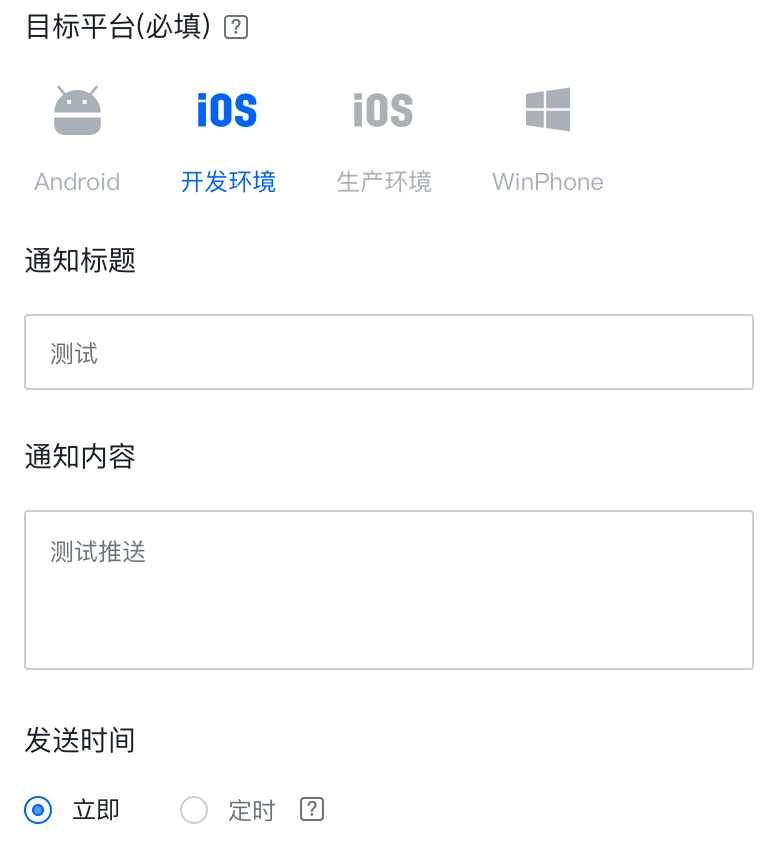
4.测试消息推送
前往极光官网、找到发送通知,只需填写这几项就可以测试是否能收到推送。
最后收到的推送大致格式为:
1
2
3
4
5
6
7
8
| {
"alert": {
"body": "test body",
"title": "test title"
},
"badge": 1,
"sound": "default"
}
|
2.跳转页面
首先在应用主页面(或其他页面)的ViewController里创建跳转页面相关代码:
1
2
3
4
5
6
7
8
9
| override func viewDidLoad() {
NotificationCenter.default.addObserver(self, selector: #selector(jpush(noti:)), name: NSNotification.Name(rawValue: "jpush"), object: nil)
}
// MARK: - 直接跳转对应页面
@objc func jpush(noti: Notification) {
let jpushViewController = mainStoryboard.instantiateViewController(withIdentifier: "jpushViewController")as!JpushViewController
self.present(jpushViewController, animated: true, completion: nil)
}
|
然后在用户点击推送时执行:
 1
 2
 3
 4
 5
 6
 7
 8
 9
10
11
| @available(iOS 10.0, *)
func jpushNotificationCenter(_ center: UNUserNotificationCenter!, didReceive response: UNNotificationResponse!, withCompletionHandler completionHandler: (() -> Void)!) {
print("点击推送消息 content=\(response.notification.request.content.userInfo)")
let userInfo = response.notification.request.content.userInfo
if response.notification.request.trigger is UNPushNotificationTrigger {
JPUSHService.handleRemoteNotification(userInfo)
}
let notification = NSNotification.Name(rawValue: "jpush")
NotificationCenter.default.post(name: notification, object: nil, userInfo: nil)
completionHandler()
}
|
跳转页面功能就完成了。如果需要推送消息携带额外信息,可以在后台将键值对添加到 extra 中,键值对会被添加在 response.notification.request.content.userInfo 里,直接取出就行。